How to Sew A Rice Heating Pad
I have been meaning to sew a homemade rice heating pad for a while now. It is the simplest project ever, and took maybe a total of 15 minutes, if that! I even had my materials waiting for me on my shelf for the last 6 months.
Need A Good Sewing Project?
The reason it took me so long to finally sew this rice heating pad up was that I had to lug my sewing machine out of my closet and set up on my kitchen table. I don’t have a sewing space…yet! This machine is very heavy. It is a doozy of a beast…a Kenmore bought in 1981 by my great grandmother, Mabel. It was passed down to me, because otherwise it would have been thrown out and I needed a sewing machine.
Other than a few bobbin issues here and there, it runs like a Singer. (Pun intended.)
So on this sewing day, I pieced together a lovely linen apron, then decided to go ahead and sew up my heating pad.
*Big Disclaimer* I am nowhere near a professional seamstress. I use an old sewing machine, and need a lot of instructions when I make something. I am not giving any great sewing advice here, just a how-to on making something usable for your family!
*Another disclaimer* I am not a medical professional. I only share this article to show you how to sew a simple project to keep with your first aid supplies. If you have an injury, seek medical attention.
Why A Rice Heating Pad?
Don’t they make those at the store?
Yes, they do. But I wanted to have this rice heating pad to tuck away in my natural first aid kit. It’s just the way I wanted to do things.
I had some rice in my cabinet that was pretty old and needed to be used. It had been neglected, and I had already bought months worth of rice after it. So I could spare this rice to be used in the heating pad.
I had read that you could just use a sock, and simply tie it up with the rice inside to use as the heating pad. But I wanted it to at least be a little pretty and colorful! (But remember, in a pinch you can totally use a sock!)
Heating pads come in handy for so many little ailments. Earache, headache, stomachache, menstrual cramps, back pain…the list could go on.
Instead of plugging up my old electric heating pad, now we will have an all natural rice heating pad in its place.
I heard you can even add essential oils to the rice. I did not do this, but you can certainly research it yourself and give it a try.

How Do I Even Use a Rice Heating Pad?
It is simple. You can either heat it in the microwave for 30 seconds to a minute. Or you can heat it slowly in the oven set to around 200 degrees.
OF COURSE you will always want to test the temperature of the rice pad before you put it on someone, or yourself. Make sure it isn’t too hot or you will burn your patient.
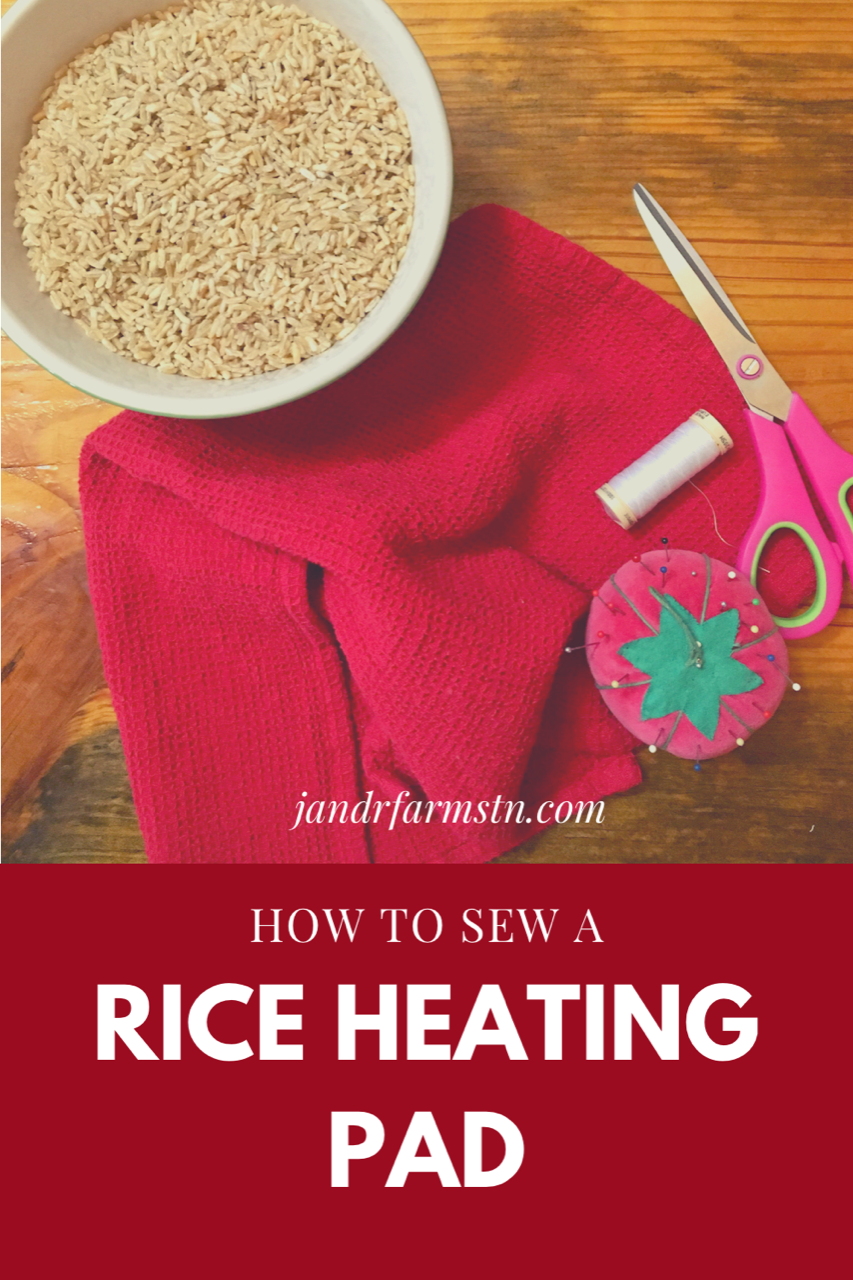
Let’s Sew: The Materials

You will need:
1 kitchen towel
Dried rice (I used four cups)
Sewing machine
Scissors
That will do it. Nothing fancy.
Sewing the Towel:
I used an old kitchen towel that I had laying around in my drawer. You can certainly use about anything! I have seen lovely embroidered rice heating pads. But I didn’t really have time for that.
The first thing to do is make sure your sewing machine is ready to go. It is threaded and all set.
Then, fold your towel right sides together.
You will have three sides to sew. I used the existing seam on the towel as my guide, and sewed right at the base of the chunky seam.

Start at the side that meets the crease of the middle. Sew up one side.
Turn your towel while the needle is still in, and sew the second side.
Turn the towel one more time to sew the third side until you have about three inches left.
Leave a hole opening to pour your rice into.
Now you will turn the towel inside out, making a nice bag.

Adding the Rice:

I used four cups of dried rice. Depending on the size of your towel, you may need to use more or less.
The four cups I had filled it nicely, while still leaving room so it could be folded. I did not stuff it to the brim. (In case of back injuries, I wanted there to be plenty of surface area coverage, but also foldable to be small enough for little ears.)
Finishing the Rice Heating Pad:
With the rice in the bag, fold the opening under, where it matches the other seam. Sew close to the edge, sealing the hole up.

That’s all you need to do!
This was a super easy, useful project. I hope you give it a try! It will certainly come in handy on those days when you just need a heating pad.

DIY Rice Heating Pad
Materials
- 1 kitchen towel
- 4 cups dried rice more or less depending on the size of your towel
- sewing machine and sewing supplies
Instructions
- Prepare the kitchen towel for sewing by folding right sides together.
- Start sewing along the existing hem at the bottom of the folded towel.
- You will sew up one side, keep your needle in the towel, turn it and sew down the other side. Repeat once more down the third side, leaving at least a 3 inch hole.
- Turn the towel-now a bag- inside out.
- Pour the rice into the bag. Fill to the desired amount.
- Turn the opening under to match the other seam on the bag.
- Sew a final seam up the side of the bag, using a very thin seam allowance.
Using the heating pad:
- To use the heating pad, either heat it for a minute in the microwave, or heat for a few minutes in a 200 degree oven. CAUTION: always check the temperature of the heating pad before applying it to you or someone else!
- Disclaimer: I am not a medical professional and only share this as a guide for a simple sewing project for home first aid. If you have an injury, seek medical attention.
Notes


Bridal Hairstyles
Hello! I’ve been reading your weblog for some time now and finally got the courage to go ahead and give you a shout out from Dallas Texas! Just wanted to say keep up the great job!